

So, you've downloaded that manual you need to help you with your restoration project, or maybe just for instructions on how to operate that Hamfest find, or you simply need a schematic and a parts list. You've downloaded about thirty pages, more than likely printed on one side unless you have one of those printers that will do two sides. Now you have all these loose sheets that are too many to really simply staple. So, you grab that three-hole punch and knock out three holes so you can just snap those pages into a three ring binder. Which, isn't actually a bad thing to do sometimes.... unless you've punched into the text or into that section of the schematic or parts list that, it turns out, you critically need. Is there a better way?
I think so. Why not bind it like a bookbinder would? It's not as hard as you might think.
A book composed of single sheets, as opposed to sewn leaflets, or "signatures", is actually little more than a glued paper pad with a cover surrounding it. This is called "Perfect Binding". Even hardback (case-bound) books are bound this way. It's a cost savings for the publisher, and these books actually look really good.
But it has limited life. That is, unless steps are taken to build in some strength and reinforcement, so the book, or booklet - won't tear itself up. I have two hard bound books that are now over ten years old and are doing just that. Tearing itself up. The pages have fatigued the glue that holds it in, and once one page works loose, something like a domino effect begins. More and more work loose and fall out.
In this blog installment, I will attempt to show you how to bind your manual such that you have a shot of keeping it in your inventory for a long, long time, and handle well. To a book binder, a book is a living breathing thing, comprising of a front cover, a back cover, a spine, and a text block (the assembled pages.) Everything else is what binds all these elements each other such that one doesn't damage the other in it's normal course of operation.
Lets begin. First you will need to round up a few things.
.
.

I will use a 60-odd page manual I downloaded sometime back as our project. We will bind this manual, possibly better than it originally came from the publisher. I'll go over these items one by one.
1. A bone folder. this is nothing but a strip of bone, probably cuttlebone, cut and polished in the shape you see in the photo. It's purpose is to smoothe, to crease, to flatten, and to otherwise apply pressure without leaving a mark. Other things can be used. A smooth plastic 150mm ruler, for instance. Make sure there are no sharp edges, you want the edges rounded, or at least, not sharp enough to create an accidental tear in your project. I've even used the back of a teaspoon, although be careful using metal to smoothe or rub paper. Some metals leave a streak or some sort of deposit. I used a high grade stainless spoon, but only after testing it on scrap paper to make sure I didn't leave a mark.
2. Open weave muslin, or linen. This is called "mull" in binding parlance. It gets glued to the spine and serves a very important purpose in re-enforcing the spine. More on that later.
3. The front cover. If one is included in your download. They usually are. I would use cover weight for the front and back cover.
4. "End Sheets". You need two for the front and the back. This can be just a blank 8.5x11 inch blank sheet, although usually I use a nice quality low weight or "text weight" or textured bond paper, like Neenah linen or Classic Laid. In fact, I usually print out a nice manual using Neenah Classic Laid, classic white, for the text block (the printed pages, the "guts" of your manual.) You can get some nice faux marble 8.5x11 sheets at Hobby Lobby or almost any craft store.
5. Your text block. Now you know what that is... if you read the above.
6. The back cover. It might be the downloaded and printed back cover of one is included, if not, it can be a blank piece of the same stock you used for the front cover. The front cover must be of the same stock type as the back. The two must match.
7. Glue. You want a glue with superior holding power with the materials you use, one that will not change color with age because of acids, one that ages well. As a binder, I find good ol' Elmer's Glue hard to beat for the money.
Aside from this, some boards and two larger C-clamps would be good. The photos will give you and idea of the size and type of wood you might use. I suggest poplar or oak or at least clear pine. These can be have, almost pre-cut, from Lowes or Home Depot.
You will also need a couple single edge razor blades and a metal straight edge such as a metal 18" ruler. These will be used for final trimming.
.
.

So, once again, from back to front:
-Back cover (notice how I bent the edge upward. A little over half the thickness of your text block.
-End sheet.
-Text Block
-End sheet
-Front cover. (notice how I bend the edge down...a little over half the thickness of your text block. Can you see what's happening here?)
Let's begin.
.
.

Starting with your text block, stack the several pages even and edge level as possible. I use a flat edge to "jog" the paper against to insure even-ness. When you have it even, hold the spine edge firmly and rest it between two pieces of wood as shown. What I do is lay some wood behind the clamping board so the paper lies flat, then using a flat edge at the front, jog the paper from behind with another clean, straight piece of wood. I usually apply pressure from the back forcing the paper against a straight edge, another piece of wood from the front, laying down the top piece of wood onto the paper. Holding it in place, I apply the C clamps. I then double check the staightness and flatness of the spine end of the text block now held in place by the clamps.
.
.

This is the front, showing the spine end of the text block, which is very level and flat. The text block is also level with the wood at the front end.
.
.

While the next step can be done in a vertical position, I find it much easier to do the next step if you can hang the clamp and block so the spine is horizontal, as shown. I used an old wooden wine crate I had around the shack/ print shop. A cardboard box would do.
.
.

.

Next, run a bead of glue down the center of the spine. You want enough to rub over the entire spine leaving a good and level coating of glue. Try not to get any glue on the wood, or at least, not a lot. You don't want the paper to glue to the wood. Let set until the glue is almost dry, but not quite. At this point, apply the mull as shown, and run yet another bead of glue down the middle. Again, you want enough to leave a level coating. Try to cover only the glued area of the spine, as best you can.
When dry, release carefully. You might wish to have a kitchen butter knife to separate the text block from the wood, no doubt some part of the spine will have a little adhesion to the wood here and there. The knife (I use a paring knife) will cut through the glue but leave the paper undamaged.
.
.

This is what you should have at this point. The mull should overlap the text block by about the width of the spine itself, maybe a tad more. It's not that critical just so there is some overlap which can be bent over and glued, which is the next step.
.
.

At this point, place one end sheet over the front of the text block. The mull will be folded over and and glued to this sheet.
.
.
This is another view of the above step. The end sheet is placed atop the text block, ready to be glued onto the mull.
.
.

Run a bead of glue as shown. Smooth out with your finger. Then fold the mull over, letting the glue penetrate the mull.
.
.

I use my finger for this because I can feel when the glue layer is penetrating the mull. Some use the bone folder, which is ok, so long as you clean off the bone folder afterward.
Now that you did this side, repeat the above steps on the other, and let dry.
The next steps are the application of the cover.
.
.

Once the mull is dried, turn the text block to the back side and run another bead of glue over the folded mull, and smooth out with your finger. You want a smooth and level layer as much as you can. Don't be sparing. Note that we are starting to apply the cover from the backside first.

Apply the glue to the spine as well. The reason is when you apply the rear cover, that fold we made at the spine edge of the printed covers will overlap onto the spine. So it will be glued over the mull on the back atop the end sheet and to the spine.
.


Use your folder to smooth down the cover where it is glued. Smooth out any bubbles or irregularities such as you can. We want a sharp angle where the fold is. Smooth out that spine. At this point, repeat on the other side using the front cover, of course. Note that when you fold the front cover folded edge over the spine, it will go over the back cover fold you just applied. Apply glue to the inside of that fold, and smooth over the spine and mull with a folder, bone or otherwise, as before. You want firm and even contact with the mull, as the mull is making firm and even contact with the end-sheets and the spine. Can you see how these elements all play together?
The next steps involve the final clamping. If you have a nice bookpress, you can use that here as well. I am assuming you don't have one of those. Nice as they are, they are seriously overpriced these days. Mine is a home shop made "nipping press", but that's another story.
Back to our project: Here is where I use either a transparency or a piece of wax paper. In the photos below I am using a transparency folded to fit over the spine, the front and the back.
.
.


At this juncture, the glue is only semi dry. Get your boards and C clamps ready, we are gonna lock this puppy up to dry under pressure.
.
.


Can you see how I apply pressure on the spine as well as the front and back cover? When I clamped up the manual, I left just a tad bit of the spine to poke just beyond the wood clamp, and set the whole think upside down onto the spine. No extra pressure needed, the weight of the wood, clamps and manual itself is sufficient. Let dry for a couple hours. Sometimes I let it set overnight.
.
.

At this point the manual is dry, released from the board clamps, and needs trimming. Here is where you need your single edge razors and your straight edge. Unless you happen to have a commercial cutter or a guillotine, as I have. What I will describe is what is known to binders as a "plough", essentially a blade that slices through all the sheets, guided by the straight edge.
First of all, here is why we probably need a final trim. When you folded the cover to leave a folded edge with covered the spine, you actually shortened the width of the cover. The text block is probably poking out beyond the cover by this width as well. I have never seen a manual that did not have enough manual to trim this excess off and still have sufficient margin.
Lay your straight edge where you cutting line will be, the edge of the cover. I sometimes cut a couple molecules off the cover too, to ensure a level and flat cut. Having secured your straight edge (I often just apply pressure by hand.), carefully, slowly and methodically begin to slice with your razor. It needs to be a new razor. Let the blade to the cutting. This is the way books were trimmed by this sort of plough for almost 500 years, since Gutenberg. You can made a very professional trim using this technique.
Watch your fingers, especially the hand holding the straight edge if that is how you are doing this. Slow, even slices. You are in no hurry. I would use scrap wood to cut on.
And there you go. Your new manual.
A word about my manuals: I always prefer single sided printing of manuals because each page has a blank page facing it for notes. These manuals will handle just like a work book.
I usually print schematics using three or four overlapping pages, pages trimmed to about a half inch all around to fit into a pocket I make by gluing a pocket cover inside the rear cover. I like seperate overlapping sheets for schematics because I can, if needed, join them all together but more often than not I am dealing with only a portion of the schematic at a time. Just my personal preferences. My manuals serve as a workbook as well as a manual.
.
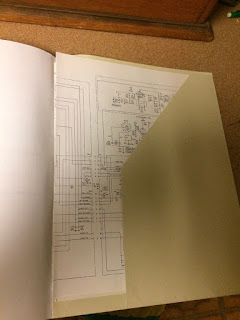 Here is the rear pocke of my latest manual for my Hallicrafters HT-37. I also have the schematic bound into the manual, but I made four separate overlapping schematic sheets so I can have both the schematic section I am working on, as well as the manual freed up to flip to whatever page I need, such as the parts listing.
.
.

.

This is my most recent manual, the Hallicrafters HT-37, copied from the original manual which I possess. I didn't want to mess up that manual, so I made this. Note that I added a linen spine covering, just for added strength at the spine. Technically I should trim this, but really, it's ok as it is. I did not overlap the covers on this manual because I used the linen spine covering (which is none other than regular 'gaffing tape'. Book binder took vendors sell it as linen bookbinding tape at about four times the price!! Go to a music store, ask for Gaffing Tape if you want to do this, too.
.
.
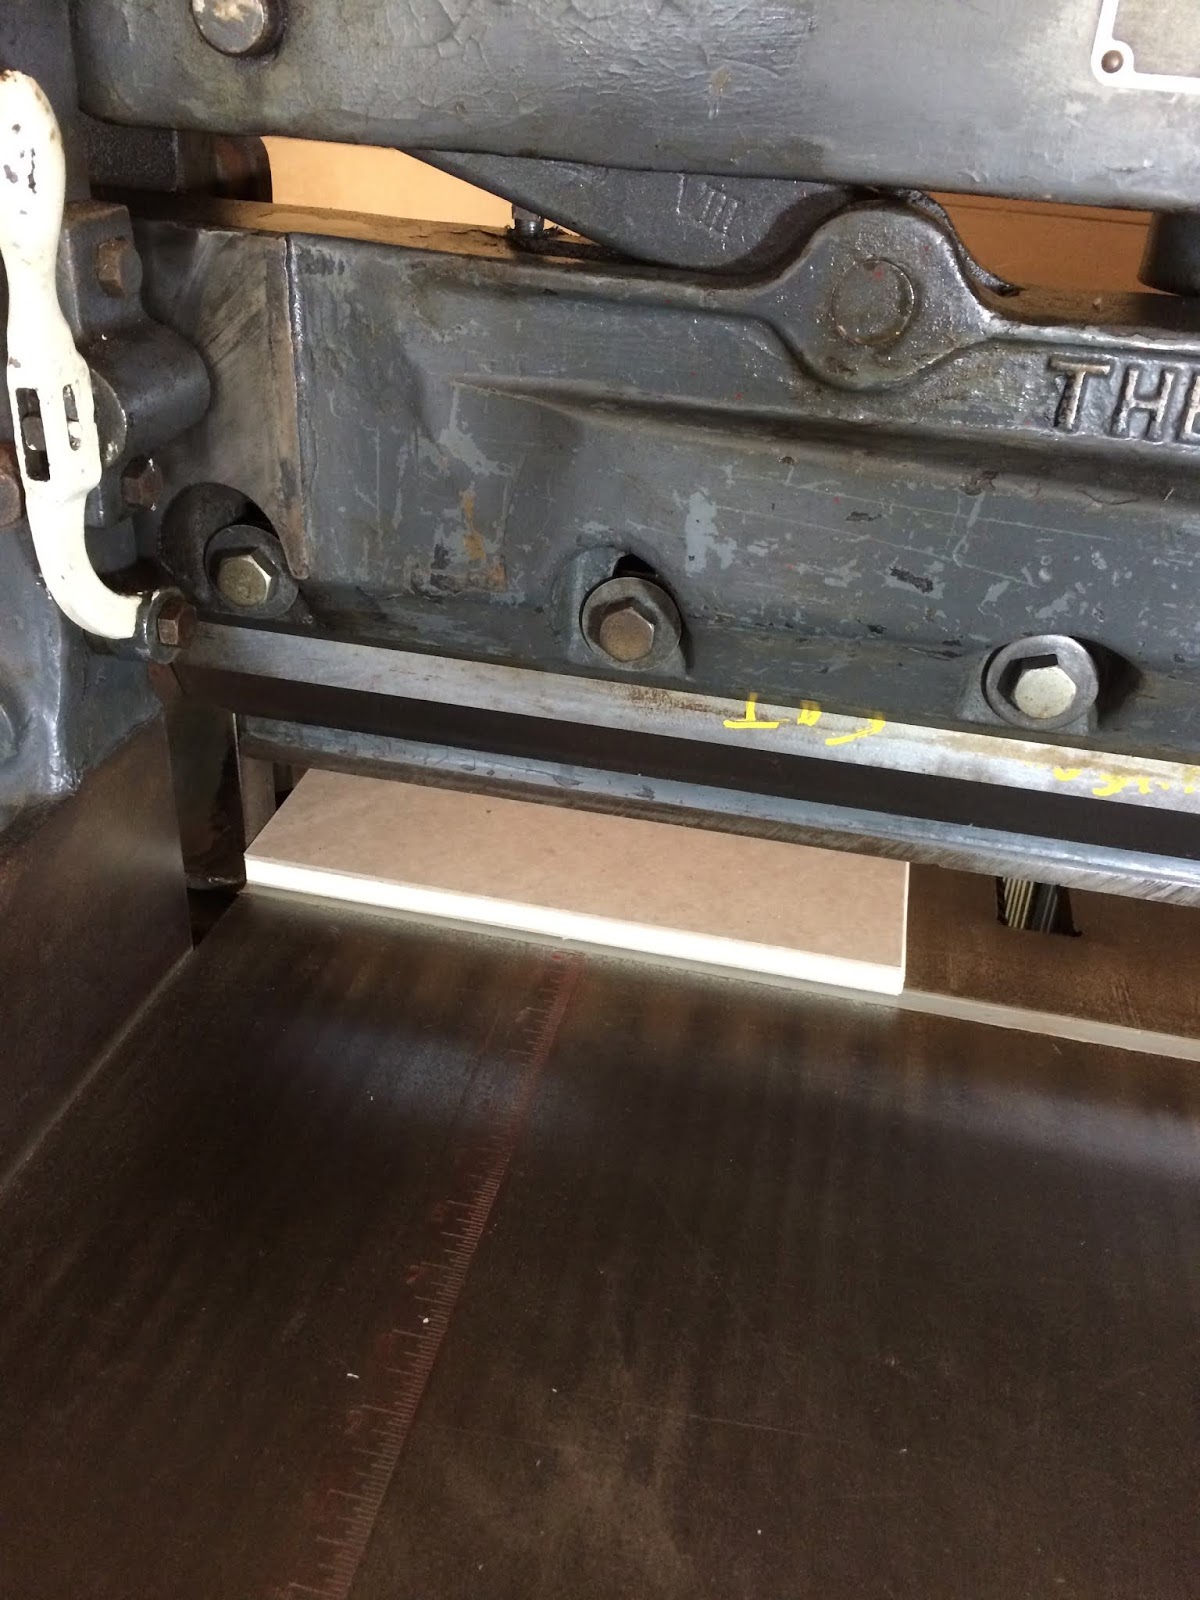


These are some shots of my 1908 vintage Craftsman 28" commercial cutter, hand lever operated. One of my favourite pieces of equipment! This is what a professional trimming looks like. If I make your manual, this is how it would be trimmed. I do have a plough, though, for fine trimming.
.
.
That's it, folks. Hope you enjoyed this installment and find it useful. There are all sorts of ways to treat this subject, what I shared was my way. As you do more and more of these, you may hit upon different techniques that may be more suitable for you. But this is a start!
vy 73 es God bless u es urs.
de wd4nka ar k
-gary
No comments:
Post a Comment