Note: these photos were uploaded in large format. To enlarge, click on the images, and download from the link by right clicking on the link image and selecting "save image as". You should be able to at least double the image size.
I'm always a little nervous whenever something comes my way that claims to be "goof proof". I am the one goof they didn't consider. When Mark Oman, WA0RBR wrote this article, a whole generation of QRP enthusiasts was just getting off the ground. This was a group that preferred simplicity, something that could be made from readily available parts, something that could be made in a couple hours. At the time, even the "simple" receiver and transmitter projects in the newly formatted ARRL handbook tended to be quite involved to build. The DC receiver was the home brew receiver of choice, regen receivers were not even on the radar. It was a time quite different from today in some respects, yet not all that different in others.
In the era of the 1980s, Radio Shack still somewhat appealed to hams and home-brewers. They actually carried broadcast caps, all sorts of chokes, and the ever popular 40673 dual gate mosFETs, MPF-102s, 2n3904s and 2n222a type transistors and FETs. And as well, a selection of power transistors, such as are used here. And while these power transistors may not be available through RS, they are still available via cross referencing NPI products, and I am sure, other manufactures as well. The ones I located on line averaged about five dollars per transistor, all such transistors benefiting by heat sink mounting.
Heat sink mounting is advised in this article published by '73. The photos show "Dyna Labels" in use for labeling. Gosh, remember the Dyna-Label guns that punched them? I always considered them along the lines of an over-stuffed chair on a front porch. But they served the purpose!
These transmitters ran on 24 volts, which the author explains is easier to use to obtain 5 watts input. I noticed in the power supply schematic that LM-317 is not included in the shopping list of parts, yet is clearly shown on the schematic. It is a linear voltage regulator, available today, which handles an adjustable range of voltages from 3 - 40v. Of course, two 12-vdc lantern batteries will do the trick, and probably last a number of hours.
Notice the handy transmit receive switch! The front panel sports a VXO. You could probably rubber about 1.5 kc out of the xtal. Now, when we say "rubber", know it means from the xtal frequency up or from the marked frequency and down. VXOs are rarely a spread range going from one side to the other. It can be done, with a combination L and C, both variable, but usually the VXO is provided just in case you find yourself at zero beat to a signal, you can "slide to the side" a little, to be heard.
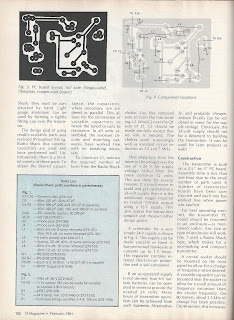
As the "Fun-Ceiver" did a few months later, this article provides an actual size foil side pc board layout so the builder could purchase the copper clad board, the Sodium Ferric Chloride, both of which Radio Shack sold, and make a pc board right there in the shack. However, most just used plain ol' Perf Board.
The last page shows the inside physical layout, which is amazingly spacious. Here, you can see the heat sinks, which are recommended by the author, and were not available at Radio Shack. Today we can get these items from Digi-Key or Mouser, probably even at Amazon.com. The transistor finals (RS 2038) are obsolete and difficult to cross reference. I might suggest a 2n3553, which carries a 7w dissipation spec, and is also an NPN type. The RS 2033, also NPN, can be replaced by an NTE-123AP. It might even be replaced by a 2n2222a.
Try one out for Novice Rig Round-Up this coming February! Let us know how you fare!
-73 es CUL, de gary / wd4nka
Try one out for Novice Rig Round-Up this coming February! Let us know how you fare!
-73 es CUL, de gary / wd4nka


No comments:
Post a Comment